Labels

Showing posts with label Gardening. Show all posts

Sunday, September 26, 2010

Wild Food Foraging

John Kallas, Ph.D., Director, Wild Food Adventures (holding wild sweet pea)

This past summer, including today, I have taken 3 classes on Wild Foods from John Kallas here in Portland. 
The first class, we went to an organic farm and learned about all the edible weeds that can grown on a farm, we picked an assortment and made a delicious salad with them..  I really do mean that it was delicious..You'd never realize how good some of these plants are!  He doesn't like to call them weeds, because really they are native plants that are indeed edible, but often mistaken for weeds. 
(rose hips)
The second class, was about survival. It was a foundation class that went over the types of survival and about some of the easier foods to find and prepare-ones to avoid because they take too much energy to prepare. He said that the number one important thing to do in a survival situation is to stay calm and simply look around for awhile and think about what your resources are and what is around you..  In other words, your psychological state is #1!!  Chances are you want to leave that situation and food isnt' really your first priority(oftentimes)--people are usually rescued within 3 days and you can survive a month without food depending on the weather and conditions..water you need much sooner, though.. 

 (beautyberry??(sp)
Today's class, was neighborhood foraging and we found lots of foods from an old city neighborhood, from trees, bushes, weeds...bushes.  (rosehips, plums, english walnut, lindentree, (pokeweed bad-unless really cooked), sheep sorrel, chestnuts, cats ear, pulslane(sp?), hawthorne, mountain ash, wild fennel, mint, wild sweet pea, green amarath, english linden tree, oregon white oak, wild spinnach, red clover, etc..) Lots of food around here!!  Learned that wild spinnach and wild garlic mustard are among the most nutritious greens known (and taste really good)!
english linden tree-like lettuce

 Brought my husband and  kids with me this time--little bit tricky with my kids..3 hours is a long time for them, I realized to listen and stand around looking at plants..but I think it was good for them to try..  My husband needed to take them for a couple breaks..  Realized that it is good for kids to be pushed sometimes even when they are bored--wasn't as fun for us, but character building for them (I hope)

In any case, these were fun and valuable classes.   He offers many many more classes..I realized through the 3 classes that I took that there is a wealth of knowledge out there!!  I only got a grazing of it..  There are many plants that are poisionous, so you really need to be careful and know what you are doing!  (for example the wild carrot looks almost just like the VERY poisonous hemlock that can kill you even in a very small quanitity and tastes good..

John Kallas also has his first book out and plans to write a whole series. 


Saturday, September 4, 2010

Harvesting and Canning


Home Harvesting-pears, fennel, pumpkins, blackberries, strawberries, garlic, beans, tomatoes, broc,


good crop of garlic this year!


ordered 20 # of nectarines for jam--surprised just how good the jam is! http://knowthyfood.com/


plum-pear jam, and nectarine jam


Farmers market green beans
Dilly Beans!

Monday, May 10, 2010

What's left in my pantry-thinking about canning

Been reading other blogs lately..getting ideas.  What a rich source of information and experience that has developed on the web.  What a wonderful forum to share---finding a newfound appreciation for blogging.  Viggie Veggieshttp://viggiesveggies.com/ is experimenting on using a pressure canning and it is making me think abot what I could do with that...  A couple of years ago, I started using a waterbath canner, and this is what I have left from that canning experience.  We've used up most of it.  I had quite a spree of it..made blackberry, strawberry-rhubarb jam, dilly beans, salsa, tomato sauce, pear butter, canned pears, pickles, and I even did some dehydrating--tomatoes, blueberries, strawberries, and cherries.  (almost gone now, but I also still have lots in my freezer from last season that I need to use up now to make room for this season) Perhaps, if I pressure-canned, I wouldn't need quite so much freezer space.. Hmmmm..

Well, for the fun of it, here is a couple pics of my emptying pantry:

There is also the idea of using lacto-fermentation...haven't done too much with that yet..made saurkraut once..perhaps a combo.. I wonder how much work it is to pressure can??  would it be less laborous than the water bath method?

Friday, May 7, 2010

Gardening update

The potatoes have a good start!

Peas are starting to twine up onto the netting.
baby pears

new cherries

And the kids have picked the first 5 strawberries to eat! 

but, I have to re-do some of my seedling plantings..  :-(  I think I planted them too soon...There has been quite a bit of cold-rainy weather and hail..(and cats)--and bugs..  poor things..some are still there, but some are turning white  (anyone know what that means??)  Anyway, I have to try again..my eggplants are all gone..eaten up..  sad sad story. but it is still early enough to try again with new starts..  (hopefully something I can do today.  I do have some seeds planted in the gardens as well..so perhaps, those will start coming up..

Oh and some chard from last year.. Chard is great. It grows for 2 years!

and garlic! (I LOVE garlic!)


The rhubarb is looking really good too..(I'll have to post that pic later though..I forgot about the rhubarb when I was taking pics)

Sunday, March 28, 2010

4th Season of Gardening. Starts with a simple seed.


Three Years Ago in April we bought our home and moved in.  Before we were even fully unpacked, I bought some starter pots and seeds and started my first tomatoes since I was a child.  One of the most exciting aspects to owning our own house (for me) was the chance to start a garden.  When I was a child my parents had a large garden during the summer and we grew lots of fresh veggies and I learned how to start seeds, compost, plant, and weed from them.  Tomato plants give off a very unique scent, that always gives me a wonderful feeling of nostalgia. 
The first year, we measured out an open space between our shed and the fence and copied a friends' design. We bought some pressure treated wood from Home Depot, (about 10'x 10')
 drilled screws in, and stapled strong black plastic around it. (because pressure treated wood has tons of toxins/chemicals in it).  We filled it with bags and bags of soil and compost, and added stones for the kids to walk on. (BTW: This was not the cheapest way to make a garden)  But, it wasn't too hard and we had a beautiful first garden that grew a surprising amount of food in about 100sqft.


The second year, we inherited some old wood and we decided to make two more beds about 5'10' each.  We used brackets to hold the lengths together, and screwed the sides together.  We ordered a truckload of soil-manure/compost mix and worked it into the orignial soil under the beds.  This was a much cheaper alternative to making beds..finding used lumber and making what you can from it.

The older bed from the previous year became a permanent/perennial garden where I bought some strawberry and asparagus crowns.  These crops will produce year after year without much more work than weeding and fertilizing.  Asparagus takes 3 years for a good crop, so you have to be patient for it to reach maturity, but it will reward you with a nice early spring crop of asparagus (march-april) every year for twenty years afterwards.  I also, as you may see to the right of the bed, bought some blueberry and raspberry bushes.


Year Number Three, I started to read a lot about gardening, about building the soil, making beds, companion growing.  And from this reading, I recommend several really good books.


There are many more books out there, but these books give a good beginner's guide to making boxes and growing food. 

The third year, we expanded some more by making two more boxes in the front yard; the best place for full sun. I was finding that my tomato plants weren't quite getting enough full sun in the backyard, and I wanted to try growing corn which also needed more sun.  Our next two beds, we wanted to "look nice" because of being in the front yard. This time, we went non-toxic and invested in cedar(cedar is expensive though, but will last a long time). 2 beds 5x10. Two boards stacked, screwed into a middle thicker block in each corner.  I was also reading about the advantage of growing vertically.  Many vining foods such as peas, beans, cucumbers, pumpkins, squashes, even tomatoes can grow up a vertical frame.   We created 4 vertical frames and nets to place on 2 of the new beds and the other 2 beds from the previous year.  (this next picture I took today of this bed March 09) The one after it is from last year's peak harvest in August. 09.  These frames are 5'-6' tall and 10' across with pea netting.  I layed newpaper (used lasagna method) over the grass and wet down, covered with leaves, compost, left-over soil from our french drain project, and bought some manure, vermiculate, peat moss, and some extra growing soil.  (building a good soil is very important because you want your veggies to have good nutrients in them)--bad, depleted soil=weak, not nutritious veggies


This next picture is of the other 2 beds with vertical frames.
And here is the 1st year bed with aspargus fronds. You just let them grow and not cut them down until they turn brown in the fall. Then you cover them up with straw.

And strawberries
And raspberries/blueberries

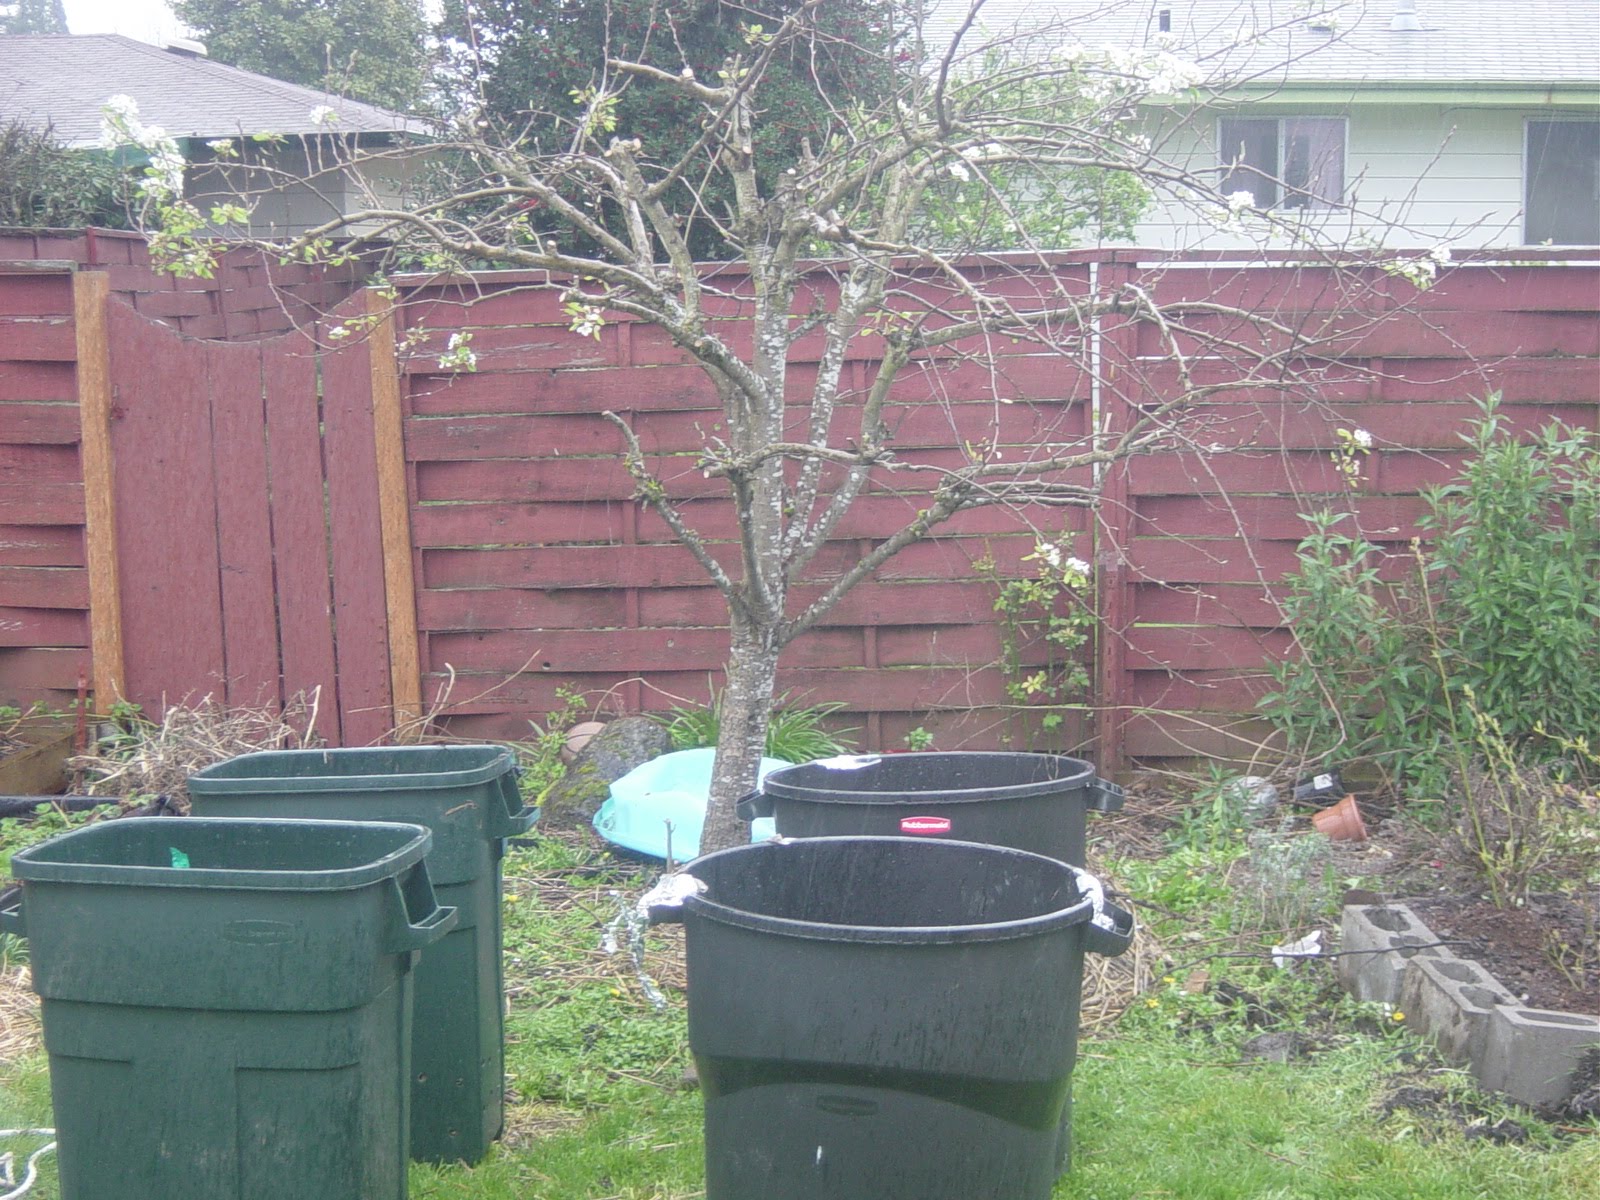
Last year, we also grew potatoes in garbage cans.  I bought 4 garbage cans, drilled holes in the bottom and 1/3 up the sides for drainage. Put some pea gravel in the bottom of them. (potatoes really need to have soil that drains) and put potting soil and compost 1/4 of the way up, planted the seed potatoes 4-5 per can) covered with more compst and soil. (this year, I'm economizing and bulking it with straw) I covered the sides with tin foil  to reflect light. They need lots of sun.  As the leaves grow up, keep covering the stems with more soil. Always keep those stems covered.  They will eventually flower.   I think they are done when they wither.  That is about when I harvested them last year. Just dump the soil out.  Don't reuse the soil for potatoes again for 3 years, but the soil can be used for other things. 

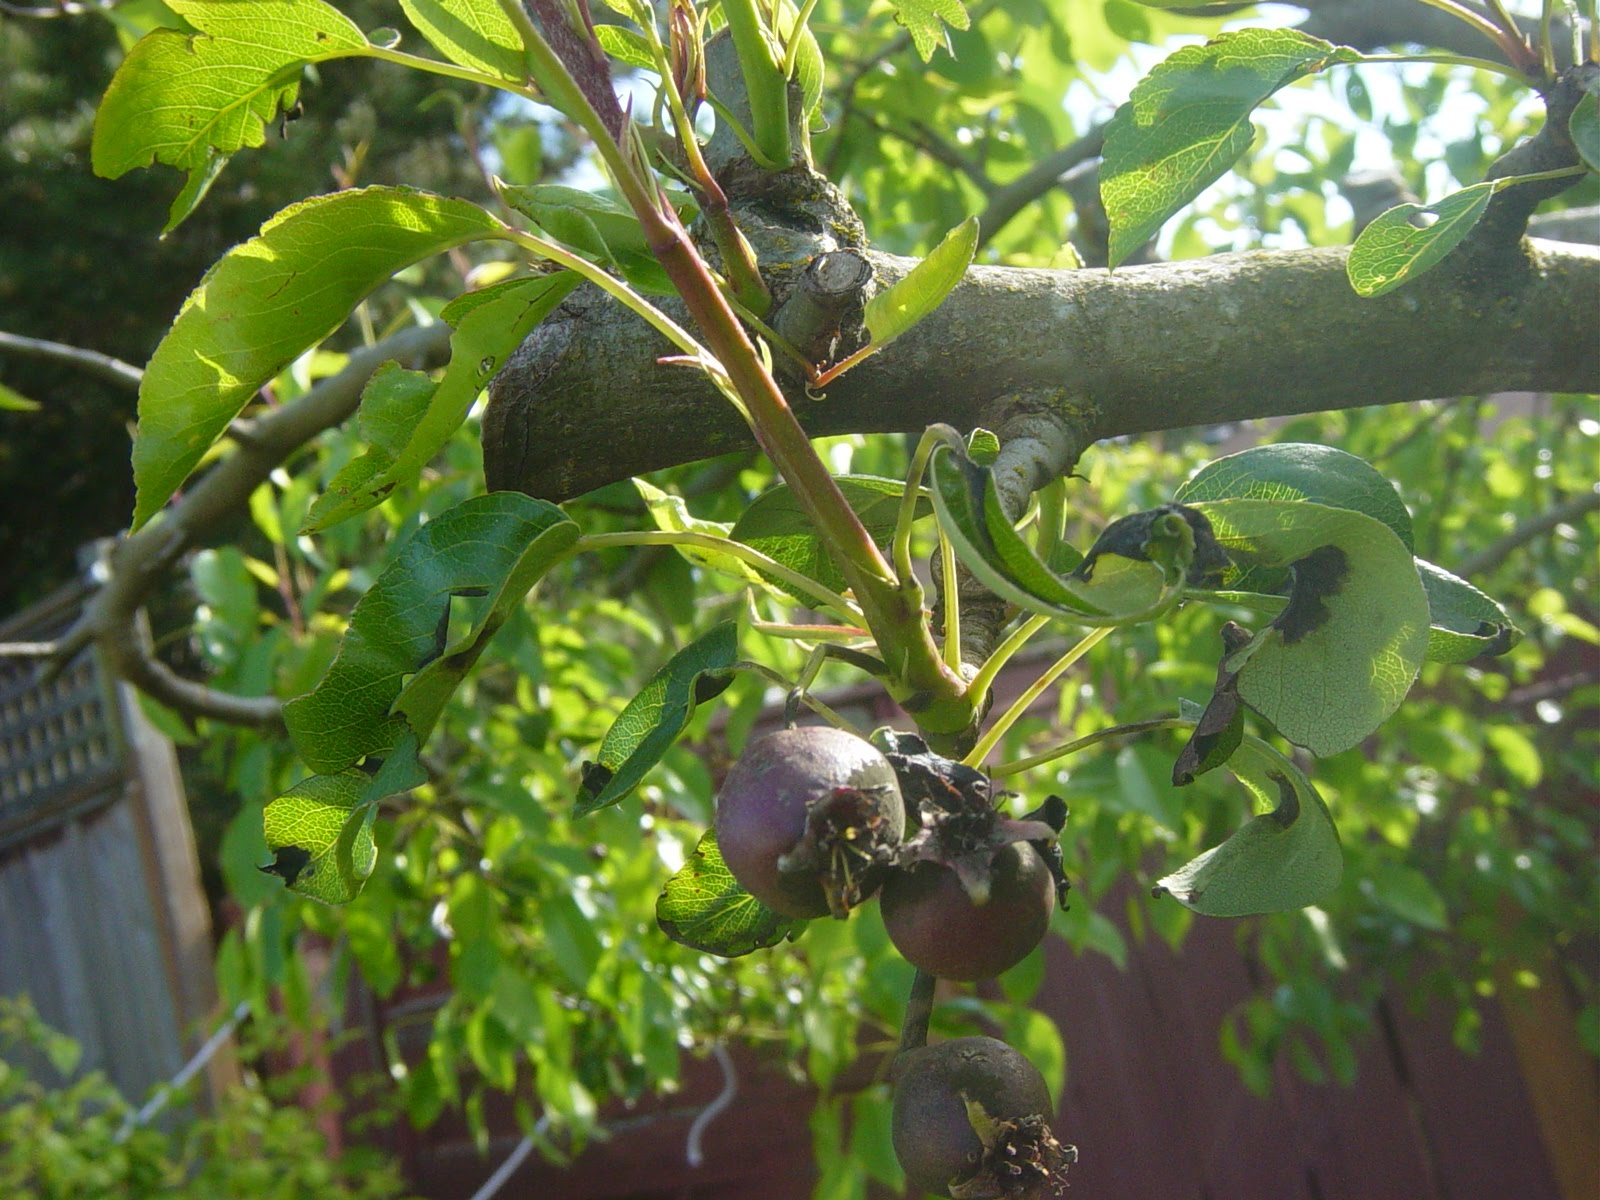
Below is the 4 garbage cans for potatoes and our pear tree behind them.

These past 3 Seasons, we have also composted our vegetable scraps, which in itself deserves its own blog entry as does growing each vegetable/fruit, but this entry is a survey of what we have done, and perhaps I'll go into more detail later.  We use 2 earth machines. 


And some smaller projects are an herb garden, rhubarb, fruit trees, and recently we moved the blueberries. (don't plant near raspberries--raspberries will bury them!!) Another hint about blueberries (they like peat moss/acid soil)  I made this bed very economically out of cinder blocks we already had and the left-over soil from last years' potatoes.  Behind them is a little rosemary. (sooo good on chicken and lamb!)


turned the flower box into an herb garden

rhubarb and flowers
cherry and apple trees

We also have  mature pear and apricot trees, and another baby apple tree.  There is so much you can do to a small-medium city lot (especially with the square foot gardening idea and growing vertically) and adding some perennials like strawberries, fruit trees, asparagus, rhubarb, etc..!

Caring for your garden:  During the summer, around here, it gets really dry, so I water them every day.  Some people invest in a drip method. I haven't researched this yet..perhaps I'll do that too at some point. For now, I have hoses hooked up to sprinklers, because I can't hand water it all every day with over 300 sq. ft in different parts of the yard...so I let the hoses and sprinklers do it for me.  Another idea, we may try, though is to invest in rain barrels to collect water hooked up to our downspouts...This will be more laborous, but much more "sustainable" in conserving water. 

Each year, I also build up the soil, add manure and compost.  Plants really need nitrogen.  There is so much to share and to learn...and many details add.  This really only scratches the surface.  I really recommend reading and finding a way that works best for you.  We've tried different ways, by making the different types of beds, but recently I'm intrigued by how resourceful my next door neighbor is at finding material that does not cost too much, such as the cinderblocks and bricks, and scrapwood and her garden is absolutely gorgeous!  She is very good at composting too.  My compost is taking a long time to "cook"--I don't turn it often enough, not do I cut up the scraps small enough, etc.. 

In any case, I hope this is helpful to you starting out.  I hope you get a sense that we started small and just added on each year...Even the smallest space can produce a great amount of food. 

Some more books I recommend (on gardening and food) 


Friday, November 20, 2009

Magical, Mystical Bees: Friendly Haven Rise Farm: Jacqueline

One thing, I would love to do is add a hive or two to our yard to support our honeybees (and to have some of our own raw honey. YUM!) When I saw a documentry on PBS http://www.pbs.org/wnet/nature/episodes/silence-of-the-bees/video-full-episode/251/ about CCD, I realized that our food supply could be in trouble if our honeybees disappear. A huge part of our food is dependent upon pollunation by bees..fruit, vegetables...are all bee dependent. Bees are not just important for honey!

1 in 3 U.S. Bees Died This Winter (May 2009)
That's good news, in terms of colony collapse disorder -- but still very bad news for beekeepers. Also see our DIY backyard beekeeping guide.Read more: http://www.thedailygreen.com/environmental-news/blogs/bees/colony-collapse-disorder-88052606#ixzz0XQC7t9Fw


http://en.wikipedia.org/wiki/Colony_collapse_disorder
Colony collapse disorder (CCD) or sometimes honey bee depopulation syndrome (HBDS)[1] is a phenomenon in which worker bees from a beehive or European honey bee colony abruptly disappear. While such disappearances have occurred throughout the history of apiculture, the term colony collapse disorder was first applied to a drastic rise in the number of disappearances of Western honey bee colonies in North America in late 2006.[2] Colony collapse is economically significant because many agricultural crops worldwide are pollinated by bees.


A couple of years ago, I attended a Beekeeping class at this farm:

Jacqueline was an amazing teacher. I still feel refreshed when I think about the hours I spent on her farm that day and what I learned. She is a bee rescuer. She will get a call that a swarm has been located in someone's barn, or inside of someone's wall, and she will capture and relocate the swarm and create a new hive/home for it.
I believe she takes a bio-dynamic approach to farming. (something I would like to learn more about!)
Biodynamic agriculture is a method of organic farming that treats farms as unified and individual organisms,[1] emphasizing balancing the holistic development and interrelationship of the soil, plants, animals as a self-nourishing system without external inputs[2] insofar as this is possible given the loss of nutrients due to the export of food.[3]
Regarded by some as the first modern ecological farming system,[4] biodynamic farming has much in common with other organic approaches, such as emphasizing the use of manures and composts and excluding of the use of artificial chemicals on soil and plants. Methods unique to the biodynamic approach include the use of fermented herbal and mineral preparations as compost additives and field sprays and the use of an astronomical sowing and planting calendar.[5] Biodynamics originated out of the work of Rudolf Steiner, the founder of the spiritual philosophy anthroposophy.


Jacqueline takes an approach that is very different from commercial beekeeping. Did you know that most commercial hives do not contain a true queen, but a "weaker" substitute queen that is only supposed to function for about a year until a true queen is born, but subs are continued to be used, to keep the hive from swarming away? These subs, will never be strong like the true queens..never meant to be the queen for long, etc.... Did you know that queens are marked with a dot-from a permanent marker so that commercial beekeepers can keep track of the queen. I could go on and on about why bees could be disappearing..pesticides, monoculture crops, commercial-large scale practices, etc..
http://www.pbs.org/wnet/nature/episodes/silence-of-the-bees/ccd-update-from-dennis-van-engelsdorp-may-2009/4991/"Every colony has a queen, and what we’re finding is that those queens are dying. And if a colony is unable to successfully replace them, or if the beekeeper is unable to identify that there’s a problem with the queen and buy a new queen to replace her, the colony dies.
Also, we’re finding that beekeepers tend to have better success keeping their colonies alive by keeping colonies as healthy as possible and by aggressively treating disease and keeping colonies well nourished."
It is a very interesting topic to me.. One I hope to learn more about at some point. To me, bees seem magical/mystical. I highly recommend reading The Secret Life of Bees http://www.amazon.com/Secret-Life-Bees-Monk-Kidd/dp/0143114557/ref=sr_1_1?ie=UTF8&s=books&qid=1258736331&sr=8-1
There are so many aspects to bees, that are truly amazing. How they set up their community, their hive, their social order, even how their little bodies work, how they pollunate...
http://en.wikipedia.org/wiki/Honey_bee
Amazing how important one of God's small little creatures is! How easy it is to forget...

Tuesday, October 13, 2009

Growing Potatoes


This past summer, we grew potatoes in a garbage can! Above is a pic of the potatoes we grew! Growing potatoes is a really easy and fun food to grow! You do have to be careful of the soil..you don't want to reuse the soil with other foods that are in the potato family for 3 years.
Essentially, I drilled holes in the bottom of garbage cans for drainage..in the bottom and about 12 inches above. I lined the bottom with pea gravel, then put some potting mix and compost and planted the seed potatoes..about 5 per can. I put tin foil on the insides of the cans to reflect light into the bottom of the can. As the potato stems grew, I coverd them with soil and contined to cover them all summer long until it was as high as the top of the can. You can harvest them after they flower and when the stems and leaves die. You harvest them by tipping over the cans. I've only done it once and most of the potatoes were on the bottom. I'm not sure if I had to keep covering them all summer if most of the potatoes were on the bottom? I need to learn more about this for next year..
I used the following links as a guide for how to do it!
In a garbage can:


In a wooden-built structure: This way looks really neat!!